

Attendance with Check-In & Out
In addition to tracking church members' attendance at global services and events, CustomerHarmony offers you a quick and easy way to sign in and out for specific events. Let's say an Open Day in which not only members of your community will attend, but also guests who could become future members of the community. Let's see step by step:
Create an Attendance Tracker
Let's start by setting up an attendance tracker that may well include RSVP members as well as the entire church. In addition, to include a guest field for all our visitors.
-
-
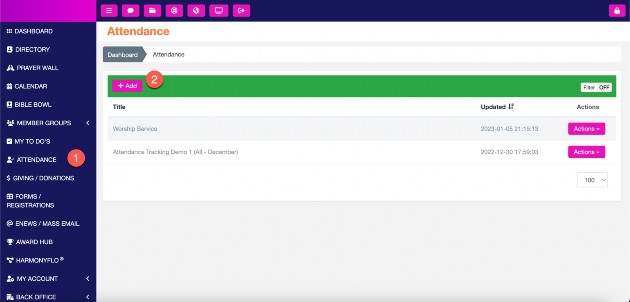
Click Attendance (In sidebar)
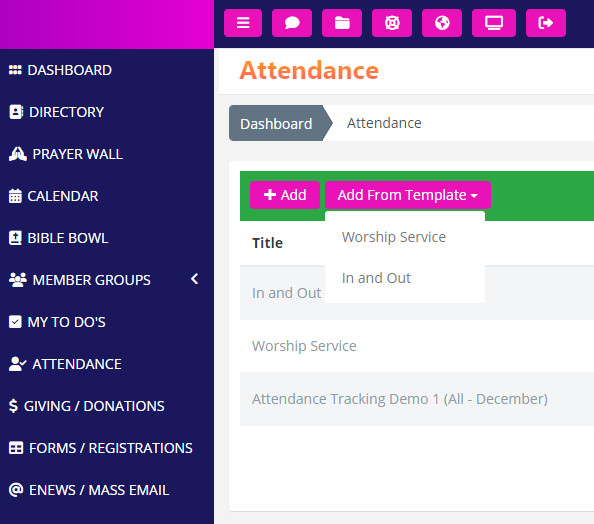
- If you would like to start with a default copy of an Attendance form with the various settings already selected (of which you can still adjust), click the Add From Template button and choose the Attendance form type you'd like to create.
- If you would like to start with a blank slate, Click Add and fill the following fields:
- Title: All the members can see this title.
- Description: All the members can see this description.
- Start Date: Date when the activity begins.
- End Date: Date when the activity finishes.
- Repeat: There are three options:
- Daily: Use this option if you want to enable the Attendance Tracker every day between the Start Date and End Date.
- Weekly: Use this option if you want to enable the Attendance Tracker on specific weekdays (Mon, Tue, Wed, Thu, Fri, Sat, Sun) between the Start Date and End Date.
- Monthly: Use this option if you want to enable the Attendance Tracker in specific month days (from 1 to 31), between the Start Date and End Date.
- Shifts: You need to specify exactly the time when the tracker should be activated. Also, you can add multiple shifts so that the Tracker will be activated multiple times during the same day.
- Name: Shift name. For example: 8AM
- Start Time: For example: 08:00
- End Time: For example: 08:59
- Attendance Type: There are two types:
- All: The attendance tracker will be available to register the assistance of all the members.
- Groups: The attendance tracker will be available to register the assistance of all the members of the selected groups.
- Check Out: Enable this option to allow and register the member’s check-out time.
- Self-Check In: Enable this option to allow the members to self-check in.
- Check In by Family: Enable this option to allow the members to check their families.
- Guests: Enable this option to allow the registration of guests (entering the First Name and Last Name of each one).
- Visitors: Enable this option to register the number of anonymous visitors.
- Online: Enable this option to register the number of online viewers.
- Is Late: Enable this option to allow the registration of late members.
- List Type: There are two options:
- User List: This option will list all the members in alphabetical order.
- Family Grid: This option will list all the family units by row and each family member by column.So, now that we are familiar with all the options, let's create a Check-in and Check-out Attendance Tracker for our Open Day by using the following information:
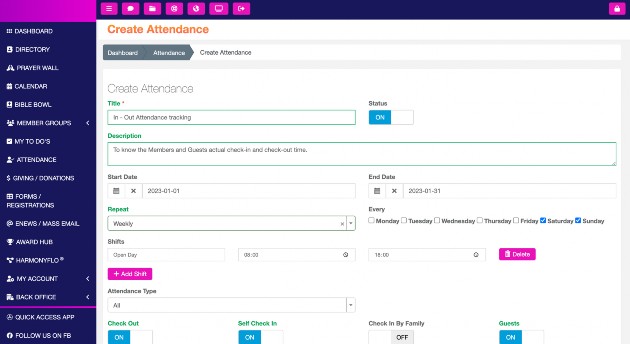
- Title: In - Out Attendance tracking
- Description: To know the Members and Guests actual check-in and check-out time.
- Start Date: Select the first day of the month, so we can record attendance from this very moment.
- End Date: Select the last day of the month, so we will be able to register the attendance any moment of this month.
- Repeat: Select Weekly so, in this case, we will be able to register the attendance on two specific days (Every Saturday and Sunday).
- Shifts: Open Day - Start Time: 08:00 and End Time 18:00
- Attendance Type: All. Because any member can assist at this event (Open Day).
- Check-Out: ON.
- Self-Check In: ON. Because we want to allow the members to use the application to self- check into the service.
- Check In by Family: OFF. Because we want to keep a detailed record this time.
- Guests: ON. Because we want to keep the option to register guest information.
- Visitors: OFF. Because we are going to keep track of all our visitors by name.
- Online: OFF. Because this is an in-person event, not a virtual one.
- Is Late: OFF. Because it is an Open Day event with flexible hours.
-
- List Type: User List. Because we want to keep a detailed track.
-
-
-
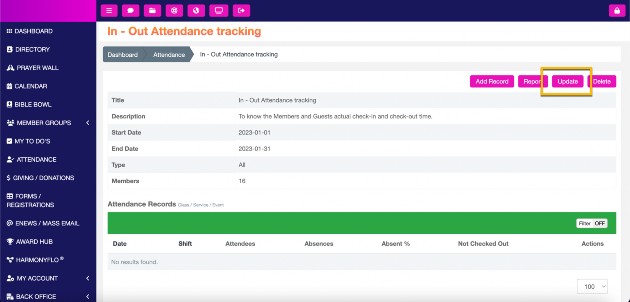
- Save. That’s it! And if you need to make any change, you can do it at any time, by clicking the Update button.
Now we can register assistance to our event quickly and easily.
Create an Attendance Record
- Click Attendance (In sidebar)
- Choose the Attendance Tracker and in it:
- Click Actions > Add Record
- Now you will see the form to register the attendance of the members. The form is dynamic and will show the fields according to the configuration that you have made in the previous step.
The big day is here. The Open Day has started, and it is time to keep track of all the attendees. As an admin or group leader, you can check in a member or a guest. And as a member, you can also register your attendance.
Important! Attendance can only be recorded on the date range, days and shifts set in the attendance tracker configuration. Otherwise, an error message will appear on the screen, indicating that you should verify that attendance can be recorded on the current day and time.

Note: As admin or group leader you can update the Attendance Tracker settings at any time. To create your attendance record, please follow the next steps:
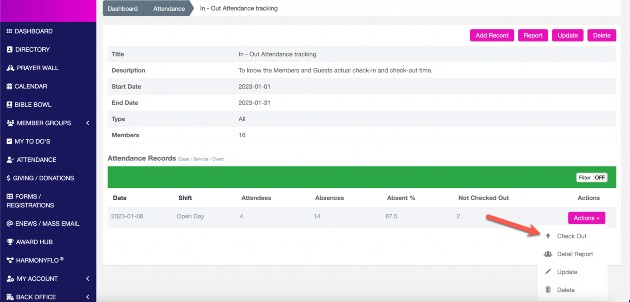
Check-Out Register
- As your event day ends, you need to check out the members and guests who arrived earlier. And there is no better way than your Check-Out Register list. Just follow the next steps:
- Click Attendance (In sidebar)
- Choose the Attendance Tracker you're going to use and in it:
- Click Actions
- Click Records
- Choose the record in which you are going to check out.
- Click Actions
- Click Check Out
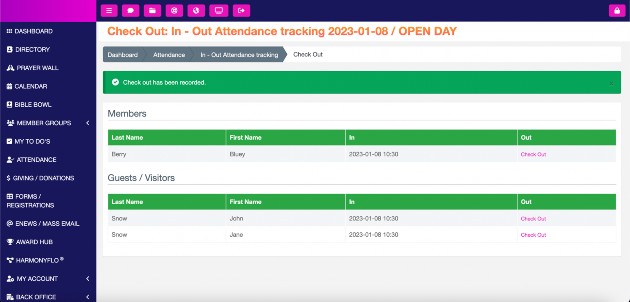
Once in there, you will see the list of members and guests by last and first name, followed by the check in date and time. And finally, the Check out link you must click to make a correct register.
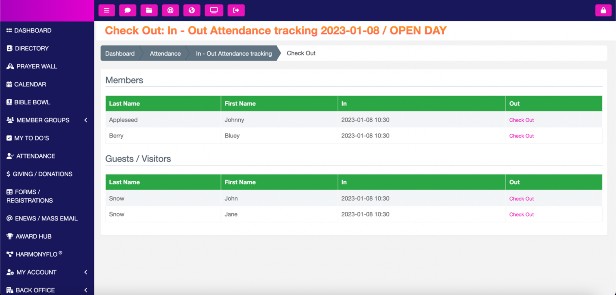
Once you mark a name on the list, it will disappear, leaving only those members or guests who have yet to register as check out.
Note: As admin or group leader you can update the Attendance Tracker settings at any time.
Update an Attendance Record
- Now that, as a group leader or admin, you know how to track members' attendance, it's important to know that you can also edit a record. An action that can be performed at any time, not necessarily during the hours that the event is active.
- To update a record just follow the steps below:
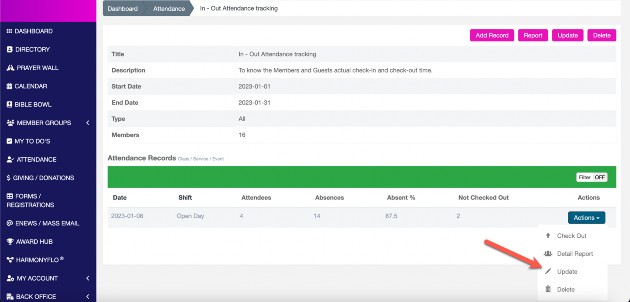
- Click Attendance (In sidebar)
- Choose the Attendance Tracker and in it:
- Click Actions
- Click Records
- And you will see all the records. Choose the record you want to edit.
- Click Actions
- Click Update
- You will find the view you got when you created this Attendance Record, and you will be able to edit everything you originally configured.
- Make all the changes you need and save.
- Self-Check In & Self-Check Out
- As a member of our community, you can also self-check in your attendance. To do this, just go to the Dashboard and click on the orange “Check-In & Check out” widget.

- After entering you will find a list of all active attendance forms. They will be visible during the time they have been configured. Choose the one that corresponds to you and mark the "I'm here" button.
- Also, you can self-check out your attendance by following the same steps as self-check in. Once in the attendance form that corresponds to you, just click on the Check-out button.
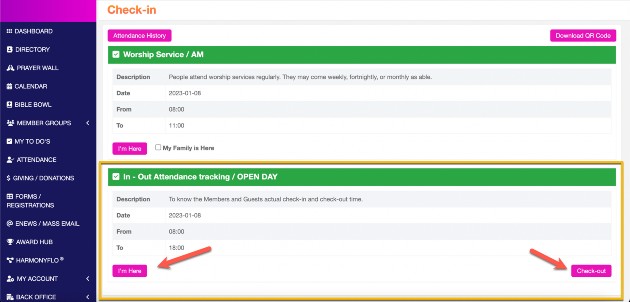
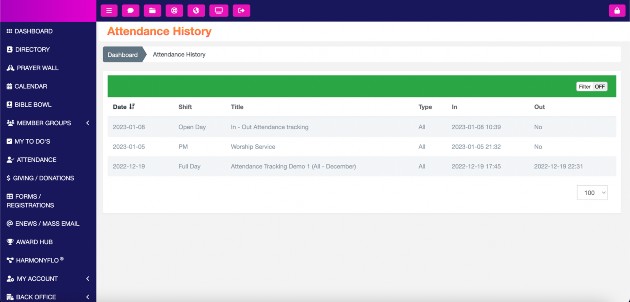
- In this same page, members can click the Attendance History link to see all their attendances to different services, classes, sessions, or events.
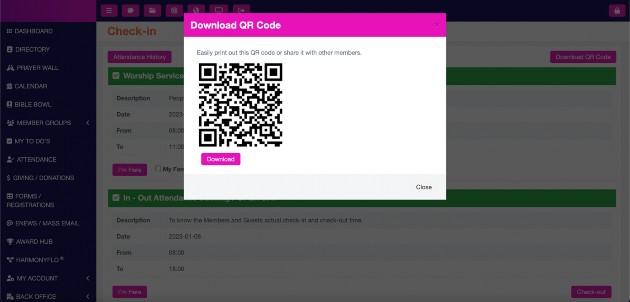
- Also, members can Download the QR code to share or publish the access to the Check-In page.
Reports
CustomerHarmony offers two types of report, a Summary Report, it’s a general one that covers all attendance records and a Detailed Report by Attendance Record.
To access the Summary Report, follow the steps below:
- Click Attendance (In sidebar)
- Choose the Attendance Tracker you want to visualize
- Click Actions
- Click Report
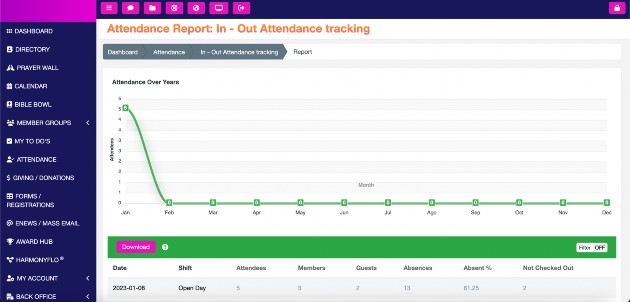
- Here you can see a line graph of attendance where each year has its own line for attending and Year over Year comparison.
- You will also be able to see the number of Attendees, Members, Absences, and other useful figures of each attendance record and, in addition, you will be able to download a csv file with all the data.
- For the type of event that we are taking as an example today, a detailed report is very useful, and CustomerHarmony offers you two ways to access it.
- From the Summary Report: To see the Detail Report of your record, just click on the date you wish to view.
- Through the Records page, by the following steps:
- Click Attendance (In sidebar)
- Choose the Attendance Tracker you want to visualize
- Click Actions
- Click Records
- Choose the Attendance Record you want to visualize
- Click Actions
- Click Detail Report
- Once in the Detail Report you will be able to see the list of members who were present or absent, the time they entered, the time they left and even the time they were present (Duration). The guests will also be listed. And all this information will also be available for download as a csv file.
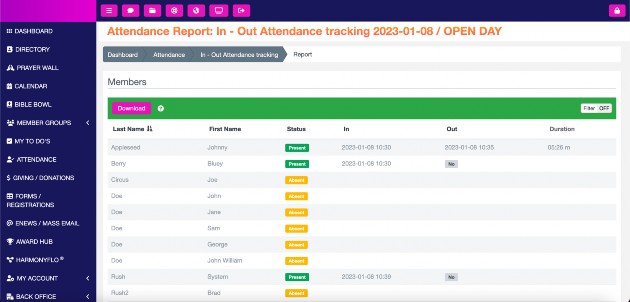
And of course, since it deals with much more information, you can enable the filters and thus find information in greater detail and much faster.
No questions yet.
CustomerHarmony
CustomerHarmony is the most innovative and the best customer management, marketing, sales, and payments solution packed with everything you need!
care@customerharmony.com | 888-420-7775
![]()
![]()
Copyright © 2023 CustomerHarmony. All Rights Reserved.